Showing posts with label original pattern. Show all posts

Tuesday, April 15, 2014

LOLA.

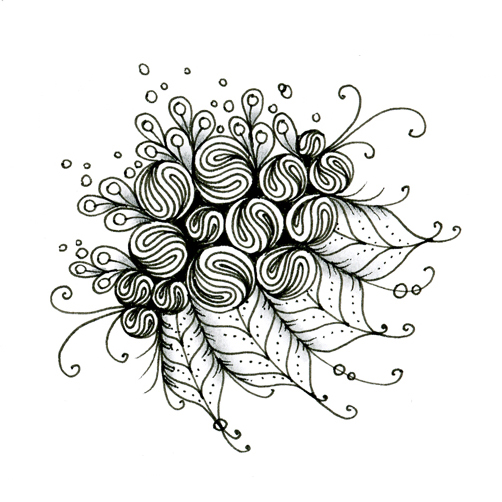
Lately my go-to tangle patterns have been curvy and flowy, and I've been playing around with a new rather feminine one that I'm calling Lola. I won't use the D-word, but developing this pattern was kind of an absent-minded process, taking one pattern and morphing it into something else, and then into something else from that, and so on, by changing one small thing with each version of the drawing until I liked the result enough to experiment further.


Here's Lola as a border...


as a flourish...


in skydiving butterfly formation... ;o)


as a border with curlies and auras...


as an 'enthusiastic' hair day...


as a walk in the garden...


...and one more zendala.


one with a watercolor background...


...and last, as a potted plant, 'cause I can. ;o)


Here's the basic how-to:


Drawing tips:

Be mindful of which 'lobe' you want to be the biggest and be consistent when drawing these, since varying that part will produce very different results.


When drawing the three inner teardrop shapes, try to keep the amount of space between the outline and the inner shapes consistent. If you have trouble, try drawing the middle one first and then the ones on either side. And the width of the 'stem' part is about how big the gap between the lines should be.


But wait, there's more!
:oD


I thought the swoopy lines of this pattern suited Helen Williams' style very much, so I gave it to her to play with last week. And she very kindly took time out of her chaotic schedule to knock it right out of the park. :oD I just love these... be sure to click on them to view them full size.


You can see more of Helen's very memorable art here.
She's got an ebook out, which you can see here.
And a video about said ebook, which you can watch here...try not to be distracted by the unbearably cute pile of snoozing kittens on her desk. 

Seriously... I had to watch it twice. 


•  •  •  •  •  •  •
Thanks for stopping by! 
Feel free to join me here
where I frequently share artsy things that inspire me, 
invite tanglers to share art,
crack silly jokes, 
and offer up the 
occasional 
tangle 
prompt. 
:oD

Saturday, April 06, 2013

EUREKA.

• ❃ • ❋ • ❁ • ✿ • ✽ • ❀ •

eu·re·ka: /yo͝oˈrēkə/
A cry of joy or satisfaction when one finds or discovers something.

• ❃ • ❋ • ❁ • ✿ • ✽ • ❀ •


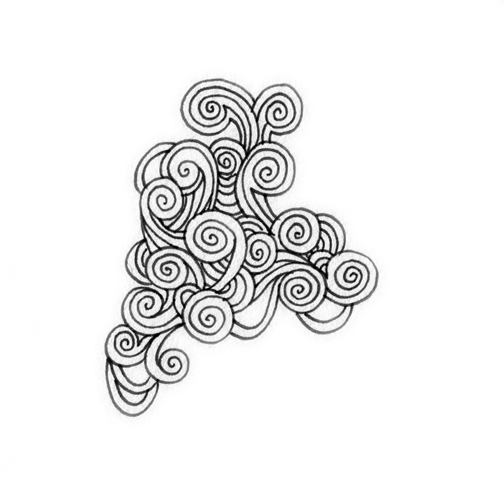
Found this fabric whilst digging through my mom's quilting stash. It looks similar to Sand Swirl at first glance, but it's drawn very differently. It's also looser and more chaotic. 

Normally I draw steps for patterns I post, but this one is probably pretty obvious. It starts with a simple spiral on a stem, with auras and 'rainbows' added in randomly to fill up the surrounding space. I noticed a few auras that were filled in alternately (like crescent moon) to create a stacked effect. I like that there are lots of subtle differences in the way the spirals are drawn.

The original fabric.


...my first attempt.


...as Zentangle-inspired art (ZIA)


• ❃ • ❋ • ❁ • ✿ • ✽ • ❀ •
Come visit me here!

Wednesday, November 14, 2012

Weekly Challenge #95: "Mickey"

Yess.... MICKEY MOUSE.

I haven't loved a weekly challenge this much since the one where we had to illustrate (in tangles) the part of the world in which we live. If this was a Disney challenge instead of a Mickey challenge, I expect a lot of us would have burned right past Mickey and come to a screeching halt in front of Tangled. hee.


Straight to it, then.

✿ Top left- the life preservers from Steamboat Willie.
✿ Left Mickey- bunzo-esque pattern, reminiscent of the tail of the Cheshire cat from Alice in Wonderland.
✿ Middle- a new pattern (no name yet) I've been playing with that just happens to resemble Mickey's shoes.
✿ Bottom right- a variation of unbatz, modified a little to look like the flower in Minnie's hat.
✿ Right Mickey- a pattern introduced to me by my stepsister (also unnamed thus far... though it looks like a bunch of smurfs sat on a photocopier).


And while we're on the subject of Mickey...
Here's one really good reason to visit Disney World.
Really REALLY good.
:oD

In case you were wondering what he looks like, here's a picture of my wonderful husband.
He's a looker, is he not?


And here's some fine art to make you giggle. We took the Disney animation studio tour on the day one of the animators was teaching the tourists how to draw Donald Duck.
Julie's


David's


mine


Paul's. 
We laughed 'til we cried when we looked at these later...


Although it may have been because we delirious from drinking these mysterious (and potentially radioactive) cocktails.

(meet Julie)

Have a good week!


Wednesday, July 18, 2012

CRUFFLE: order vs. chaos

I've been playing with a new pattern recently, and it falls right in line with my affinity for round things. Cruffle can be used with grids or dot guides if you really want them in neat rows... but personally, I'm down with chaos. I like mine all over the place like a roomful of toddlers on a rainy day.

The basics:

Some half-cruffle variations:


 If you like your cruffles well-mannered and domesticated, you can wrangle them into a grid:


Arrange them into a bouquet:

...teach them how to walk on a leash. 


Happy hump day... it's all downhill from here!

• ❃ • ❋ • ❁ • ✿ • ✽ • ❀ •

Come hang out with me on facebook... we have fun!


Sunday, May 27, 2012

BATIKI & OODLE


If there's one thing I've learned in my thirtysomething years on this planet, it is this:
Don't believe everything you hear. 

If there is one other thing I've learned, it's this:
If you're looking for patterns to deconstruct, go to a fabric store.


And my favorite variation, OODLE:


I am such a sucker for those dot-grid patterns. They call to me.

No paragraphs of instructions this time. I have nefarious plans... things to make. And give away. 

Soon.


Tuesday, May 22, 2012

Weekly Challenge #71: "Pea-Nuckle"


It's a red-letter day.

The elves in Tangletown have been busy creating/deconstructing more patterns for us to wrangle. This one answers to 'Pea-nuckle', and is the quirky brainchild of Molly Hollibaugh.

Don't you love how I say 'this one' and then present you with a tile that has a bucketload of different patterns on it? If you got here via Laura's page, you already know which one it is. And if you didn't... I'm not telling!


To be honest, drawing this tangle pattern felt a little forced to me. I think it's the kind of pattern you have to figure out how to make your own before it really clicks; kind of like trying to copy someone else's handwriting. Drawing the straight lines felt a little awkward because they were a little too long to draw comfortably, and I had trouble with the S shape because mine were too curly on the edges. Those are minor, very fixable things, though... it's such a unique pattern, and I'm sure we'll be BFFs once we get better acquainted. Off to the tangle jar it goes. :o)

Sunday, April 29, 2012

WUNDERWALL & WUNDERMUTT


I tinkered with a new pattern today! The deconstruction was was easy enough, but it took me forever to figure out how to space out the dots so the end result looked right. Anyway, *here* is the source of my euphoria, from a book of Japanese paper.


Here goes nothin'.


Columns of dots... pretty simple. This is going to be a staggered grid when it grows up, but I'm drawing it in columns becaaaaause...

(you should know that over a dozen index cards and a ridiculous amount of red ink have sacrificed themselves so I could impart this wisdom to you.)

...if you want your final pattern to look like the 'starburst' pattern above, your dots must be much farther apart horizontally than they are vertically. I tried this pattern several times over with similar (terrible) results, before I finally got that. I kept drawing a square grid without even realizing what I was doing wrong *smacks forehead* 

Here's why the spacing is important:


Notice that in both A and B the distance between the rows is the same, but the columns are twice as far apart. 


I promise, once you get this part down, the rest is cake


::2::
In case you're wondering why this part takes two steps, my staggered grids and regular dot grids always start off the same way. For a staggered dot grid, I just draw all of the dots a little further apart and then go back and add the offset dots in between. This method helps to keep everything spaced out evenly. 

That's another cookie trick.

If you don't need/want to use this method, you can ignore it, pass go, collect $200, keep calm and tangle on, go raid the fridge, et cetera.


::3:: 
Told you the rest was easier.


::4:: 
The simplest way to do this part is to draw all the lines going in the same direction, turn your tile, and then do all the lines going in the opposite direction. I didn't actually remember that until after it was finished. 
Zig-zagging works too.

The columns of dots (hey, let's call them power pellets!!) below aren't as spaced out as they should be, but since the red ink and the black ink are both in the right place, I'm gonna call that a win. 


::5::
Draw from the middle of each triangular space to each corner. I go through first and put a dot in the center to anchor my lines (as you can see above) but I freely admit this is probably not necessary. If you do it, make sure it's small enough that a single line will conceal it.

Use slow, deliberate strokes. Try to be precise at the center of each triangle, because there is no good way to conceal mistakes there. Also, try to be precise when attaching your lines to the dots in the grid because there are a lot of lines converging there. If they don't meet at the right spot, it's possible to end up with some distracting white gaps or dark spots in your final pattern. 


The end result:


And as a border:


Now that we've figured out the rules, let's break a few!


with extra dottiness


with some extra outlining here and there


buncha lines as shading.


a moderately successful attempt at Rick's Paradox.


with an oversized dot grid


with double lines.


with a very unobtrusive dot grid.


with wavy lines.


with lots of aura action.


with skinny football shapes replacing the lines in the Y


with skinny football shapes replacing ALL of the lines


•••••••••••••••••••••••••••••••••••••••••••••••••••••••••••••••••••••••••••••••••••••••••••••


I love this variation so much that he gets his own name. 

This is WUNDERMUTT. His parents are WUNDERWALL and N'ZEPPEL. Ooh, I love it when a plan comes together!


The steps are the same as Wunderwall except you draw the 'squished balloons' in the triangles before you add the Ys in the middle. 

Remember the lines in Y stop short and do not continue on to the dot, or the rounding effect is ruined.


Blogger's note: 
If you would like to try a very different approach to drawing a pattern that looks similar to Wunderwall, get your paws on a copy of 'Totally Tangled' by Sandy Steen Bartholomew and check out HEMP. 

If you're comfortable with the method outlined above, get the book anyway. Fifty pages of unique patterns, tips, and ideas... it's one of those books you can't resist flipping through. Repeatedly.


Happy tangling!