Friday, May 23, 2014

and now, for something completely different.

My very talented friend Debra makes her own hand-dyed and hand-painted fabric, which she then sells to quilters and those Very Patient people who like to applique. A couple of days ago, she invited me to her studio to join in on the fun, and I managed to snap a few photos in between steps (when my rubber gloves were clean enough to pick up my phone). Had I not been participating in the process, I would have taken more pictures... but there are still enough to get a general idea of what went down in the studio! Just FYI, this is not one of my usual 'how-to' posts... this is more of a recap. I can't guarantee all of the steps are documented here (or in any kind of logical order, for that matter)! 


The first fat quarter of fabric: 
The first few splashes of dye on presoaked fabric, which started out as a pristine white.


After Debra soaked the fabric in a bucket of dye, I got to add a little 'character' to it. With blue. 


Unscrunching and rescrunching (to expose different parts of its surface) to add a different blue....


... and again.


(If there's anything better than blue, it's more blue.)


look at all those beautiful, smurfy shades.


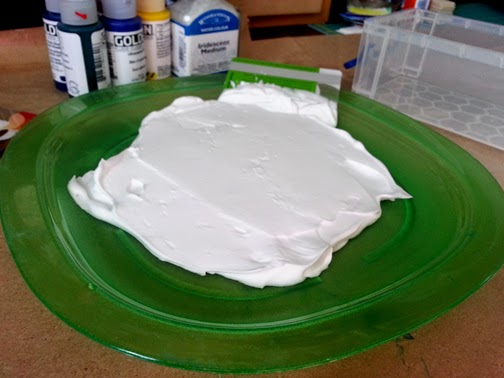
 Just wanted to point out the pretty patterning in this glass on the way to the rinse sink. 


The rinse sink... where the water never really runs clear.


A few sloshes to make the dye permanent...


 ...and then we let the color set for a while in the toasty Texas sunshine.


Smoothie, anyone? 
Just kidding. That's dye too.


wet fabric: it will look much different when it's dry.


More wet fabric. 


Wet on the left, ironed/dry on the right. 


See that pretty sunburst effect happening down at the bottom? 
No idea how that happened. But Debra knows, and that's what matters.


She gave me some to take home and play with...
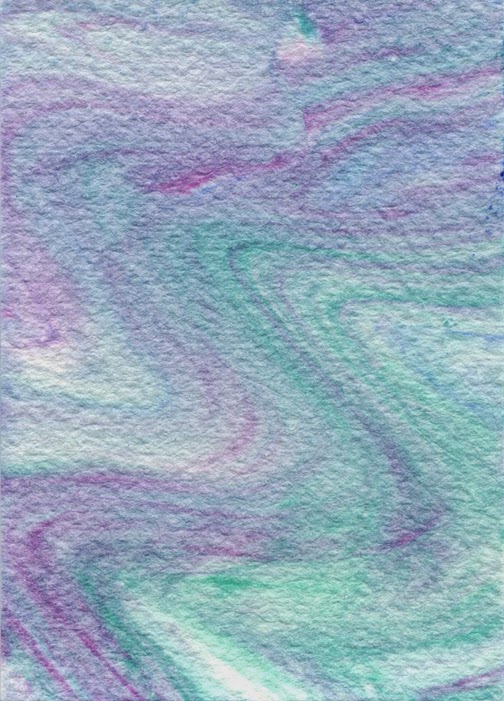
 So of course I drew all over it. :o)


That's an Identi-pen, in case you were wondering.


You can see some of Debra's art (she paints on canvas, too) here on her website.

Fabric junkies: If you're on facebook, she's got a whole album of fabric photos here... and if you only click on one link in this whole blog post, make this the one, because it's definitely worth a look. 


•  •  •  •  •  •  •

Thanks for stopping by! 
Feel free to join me here
where I frequently share artsy things that inspire me, 
invite tanglers to share art,
crack silly jokes, 
and offer up the 
occasional 
tangle 
prompt. 
:oD

Monday, May 05, 2014

the many faces of shaving cream.

I wish everybody had a friend like Brandi Cooper. She's what I like to call a 'real artist', and she's been known to teach some really fun and unusual things. She gave me a crash course in marbling paper with shaving cream a few weeks ago (actually, it all began with eggs, but that's a post for another day), and since a few people have asked me how it was done, I thought I'd share what I learned.


The cast of characters:


-something large and washable/disposable to protect your workspace.

-shaving cream, nothin' fancy.

-wet washcloth/towel/paper towel.

-heavy paper that can handle wet media, cut down to a manageable size. I used both hot press and cold press watercolor paper (140 lb).

-acrylic paint or ink.

-a sturdy, moisture-resistant plate, cookie sheet, or disposable aluminum pan (mom, I still have your green tupperware plate, k?).

-a stirring stick, pencil, chopstick or other poky item. Toothpicks are ok, but they'll take much longer to swirl the paint around because they're so small.

-a gift card or other flat, straight-edged scraper.

-container with a narrow, even edge (for scraping off your scraper).

-I also added a few drops of an iridescent medium, but have since replaced that with something from the Golden line that is more compatible with the paints I used.

-despite its presence in the above photo, you will not need the pet hair roller. If you do, you probably have a cat like mine who is constantly getting into things he shouldn't be getting into, and I symphathize with you.

You might also find an assistant useful. Preferably one with opposable thumbs, unlike mine.


First, the shaving cream- you'll need enough to make a plate-sized pancake. Helpful hint: hold your plate vertically and your shaving cream can fully upright, or you're probably gonna wear it. 

Consider this step bonus art... here we have a crouching monster on the left... and the shape on the right looks kinda like a fat seal cramming herself into an inner tube. Although I *might* be projecting a little since summery weather has arrived in Texas and I just ate half a bag of french burnt peanuts. 


Flatten and smooth your shaving cream creatures with your gift card/scraper. Don't let it sit too long, or it will crust over and won't spread right.


 Drop assorted colors in assorted places.


Sorry about the shadows and weird lighting. It was late in the day and my work lamps blow out the color in photos, so I wanted to use sunlight.

Swirl it like you mean it... 


Find an interesting spot, and press your paper straight down into it.


 Pull it straight up...


 Scrape the shaving cream off, let dry, and voila! 

A beautiful, man-scented piece of art. 


Just a side note... microns worked fine on these, but I couldn't get gel pens or paint pens to show up at all. This was before I switched from the W&N iridescent medium, which is designed for watercolor. I only used a few drops, but I don't know if it matters. 

Here are some other cards I did that day. Notice that the more I worked with the foam, the more blended and softer the colors became. That was my goal- so I could use these as background color for tangling (of course).


Happy messmaking!


•  •  •  •  •  •  •
Thanks for stopping by! 
Feel free to join me here
where I frequently share artsy things that inspire me, 
invite tanglers to share art,
crack silly jokes, 
and offer up the 
occasional 
tangle 
prompt. 
:oD